Striped Walls
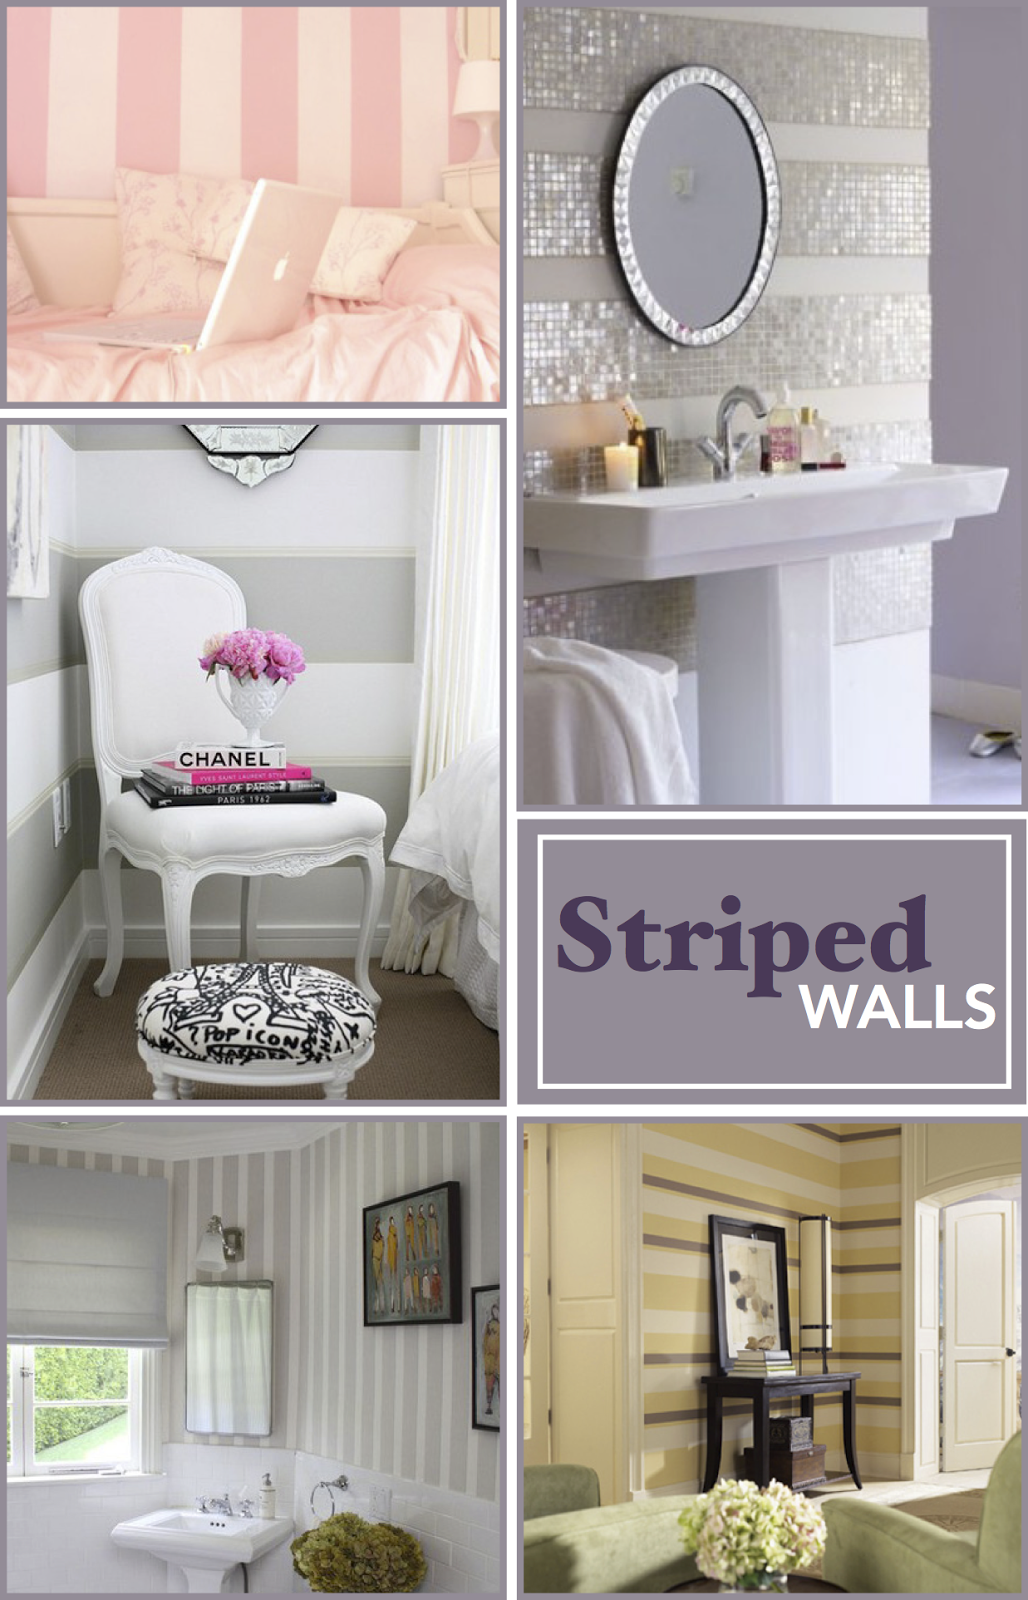
Stripes are not just limited to your wardrobe. They’re a classic way to add a graphic touch to any room from vertical/hoziontal, wide/narrow, hand-painted/wallpaper and colorful/ muted. The possibilities become endless. For as long as I can remember I have wanted to have a two tone pink stripe laundry room. To my dismay my laundry room is now downstairs in a tiny unfinished basement about the size of my college dorm room. So adding stripes is no longer a possibility which has me brainstorming of what I want to stripe. What do you think about the classic striped wall?
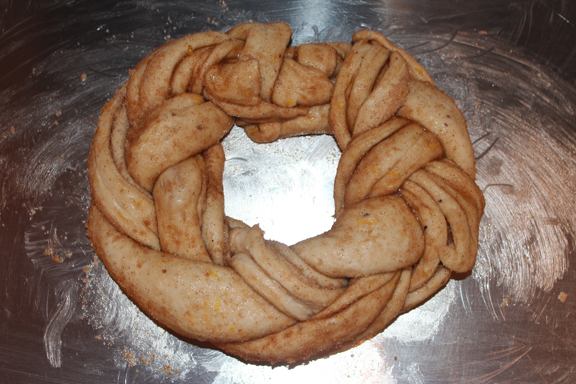
King Cake

I am not from the south so to me Mardi Gras has never really meant anything to me. That is until I visited New Orleans last year and fell in love with the city and it’s rich heritage. I loved how everyone decorated for Mardi Gras, toured the floats and ate my body weight in King Cake. Since Carnival Season officially kicked off this weekend I celebrated by making my first King Cake.
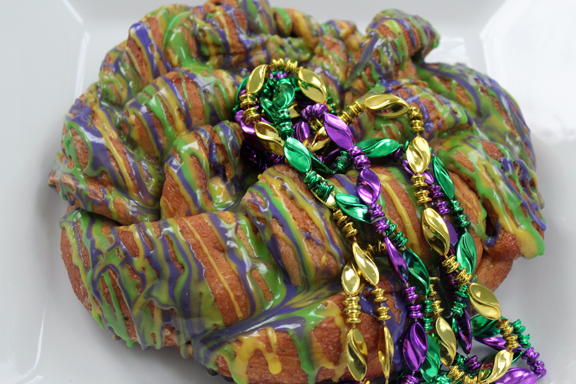
The circular shape of the cake symbolizes the path the three kings took to find Jesus in Bethlehem. The sugar topping or frosting is always in traditional Mardi Gras colors purple (Justice), gold (Power) and green (Faith), and represents a jeweled crown in honor of the three Wise Men whom visited Jesus on Epiphany. A plastic baby (I find mine at Walmart) is hidden in the cake, symbolizing the Christ child. The person who gets the baby is supposed to have good luck for a year and is to buy (or make) the next King Cake, or in some cases host the next King Cake Party. Below you will find the recipe I was taught while I was in Nola.


Mardi Gras King Cake
Ingredients:
1/2 cup (1 stick) butter, softened
2/3 cup evaporated milk
3/4 cup + 1 teaspoon sugar
1 teaspoon salt
2 envelopes active dry yeast, regular or rapid rise
3 eggs
Zest of 2 lemons
1/2 teaspoon ground nutmeg
6 cups flour
4 tablespoons (1/2 stick) butter, melted
1 egg white, for glazing
Cinnamon-Sugar Filling:
1/2 cup granulated sugar
1 teaspoon ground cinnamon
Icing:
2 cups confectioners’ sugar
2 tablespoons whole milk
Directions
1. Melt the butter in the microwave in a medium mixing bowl, add the evaporated milk, 3/4 cup of the sugar, and the salt. Stir so that the sugar dissolves and allow to cool.
2. Dissolve the yeast in 1/4 cup lukewarm water and stir in the remaining teaspoon sugar. Allow to stand for 5 minutes, until foamy.
3. Add the yeast mixture to the butter and milk mixture. Add the eggs, nutmeg and lemon zest and whisk together until well blended.
4. Whisk in the flour, 1 cup at a time, until you have a thick paste–about 3 cups flour. Then switch to a wooden spoon and continue adding flour and mixing well. Do not add more than 6 cups flour, or your cake will be too dense.
5. When you have added all the flour, turn the dough out onto a lightly floured wooden board and knead it with your hands, which you have dusted with flour, until the dough is smooth and elastic, about 10-15 minutes.
6. Place the dough into a large bowl that you have oiled, turning the dough to coat. Cover with a towel and allow to rise for one hour.
7. Make the cinnamon-sugar filling: Combine the sugar and cinnamon in a small dish and stir well.
8. Punch the dough down and divide the dough in two. Roll out each half into a rectangle. Brush each rectangle with half of the melted butter and then sprinkle each rectangle with half of the cinnamon-sugar filling mixture.
9. Roll up along the long end like a jelly roll. Press the roll together at the seam, sealing with water if necessary. Braid the two rolls together, forming one thick piece. On a greased baking sheet form the dough into a circle and seal the ends together.
10. Cover with a towel and allow the cake to rise in a warm place for about 1 hour, until it almost doubles in size. Don\’t forget to hide the baby Jesus!
11. Preheat the oven to 350. Whisk the egg white with 1 tablespoon water. Brush the top of the cake with the egg white. Bake the cake for 35 minutes, until it is browned and sounds hollow when tapped. 12. Making the icing: combine the milk and powered sugar in a dish mixing until smooth. Separate into three dishes and color gold, purple and green. Place in a baggy and cut a small hole in the edge of the bag and drizzle over the cooled cake.
Meet Jack


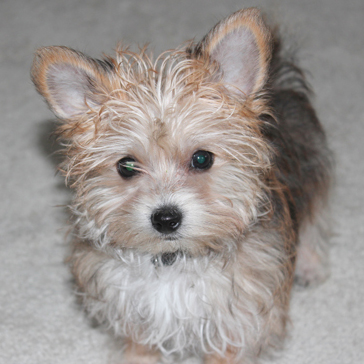
• Loves to be hand fed.
• Loves fashion as much as his mommy.
• Is being a pistol about potty training!
• Loves all things monkey.
• Will be your best friend if you call him a cute puppy.
Five Things

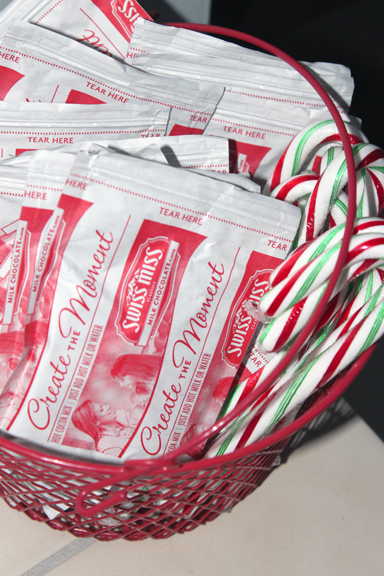
January Friendship Gift: Cocoa
You know I love to have my “Friendship Gifts” on hand for guests who drop by the house. For January I have decided on packets of cocoa and candy canes, no need for cute packaging with these, guests will appreciate the warm drink when they get home.
