How to: Turk\’s Head Knot Bracelet
Summer is approaching which mean time on the beach, by the pool or out in the water. Nautical themed items are flooding the stores. One of my favorite items for summer is a Turk\’s Head Knot Bracelet or more commonly called a Sailor\’s Knot Bracelet.
What you need
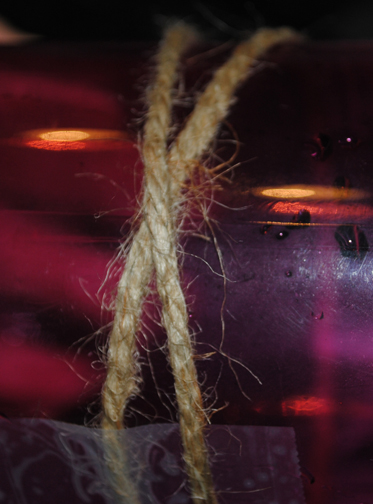
• 3.5 yards of twine/cotton twine/rope whatever you like
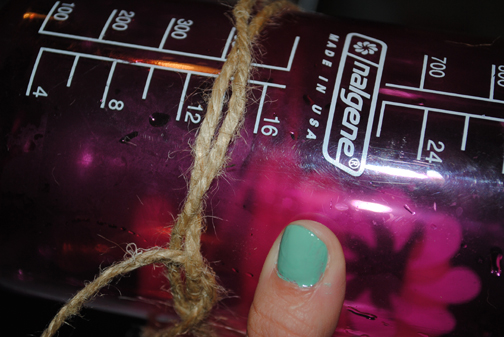
• 14 oz. can for a smaller bracelet or a 20 ounce can for a larger bracelet. Really any round object to match the circumference of your wrist will do. *NOTE: For this tutorial I used my Nalgene bottle obviously it\’s too big for my wrist I just wanted to make sure you could see what I was doing.
@font-face { font-family: \”Courier New\”; }@font-face { font-family: \”Times\”; }@font-face { font-family: \”Wingdings\”; }@font-face { font-family: \”Cambria\”; }p.MsoNormal, li.MsoNormal, div.MsoNormal { margin: 0in 0in 10pt; font-size: 12pt; font-family: \”Times New Roman\”; }div.Section1 { page: Section1; }ol { margin-bottom: 0in; }ul { margin-bottom: 0in; }

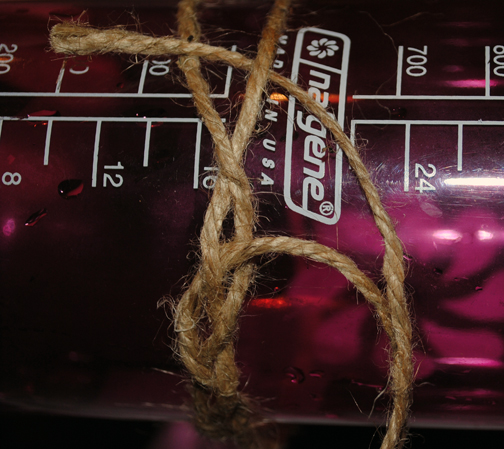
Wr@font-face { font-family: \”Courier New\”; }@font-face { font-family: \”Times\”; }@font-face { font-family: \”Wingdings\”; }@font-face { font-family: \”Cambria\”; }p.MsoNormal, li.MsoNormal, div.MsoNormal { margin: 0in 0in 10pt; font-size: 12pt; font-family: \”Times New Roman\”; }div.Section1 { page: Section1; }ol { margin-bottom: 0in; }ul { margin-bottom: 0in; } 1. Wrap one end of the twine around your round object to shape an X. Leave about a 4\” tail. You will need this at the end to finish the bracelet.
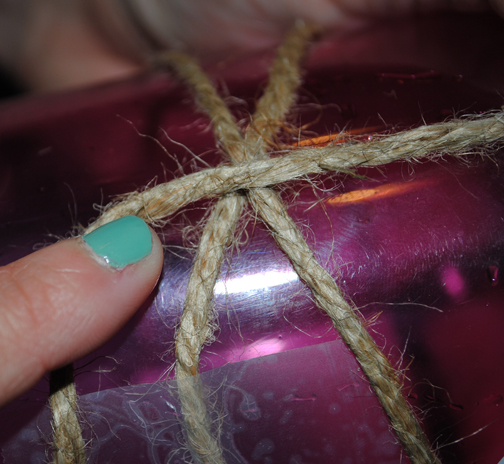
2. Wrap the long end of the twine around your round object again and bring it up to the middle of the X.
3. Pass the long end of the twine under the right, upper leg of the X and pull the long end all the way through.
@font-face { font-family: \”Times\”; }@font-face { font-family: \”Cambria\”; }p.MsoNormal, li.MsoNormal, div.MsoNormal { margin: 0in 0in 10pt; font-size: 12pt; font-family: \”Times New Roman\”; }div.Section1 { page: Section1; } 4. Next move the upper left leg of the X over the right leg of the X to create an oval shape.
5. Pull the long end of the twine through the oval shaped opening you just set up.
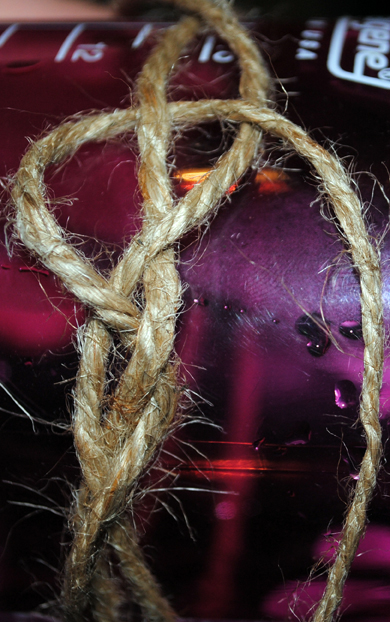
6. Turn your round object just a tiny bit and you will now see that the oval shape has created another x shape. Again, pass the long end of the twine under the right upper leg of the X and pull the end through.
7. Repeat steps 3-6 until you make it back to the beginning.
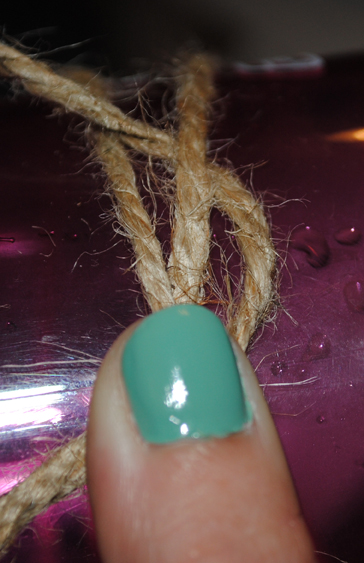
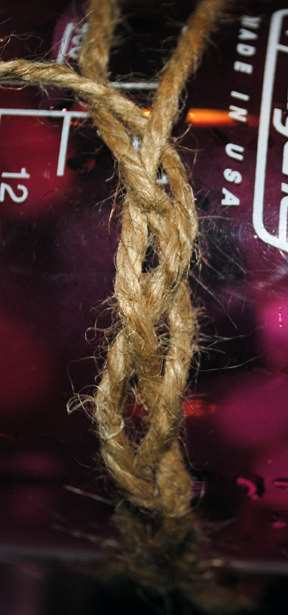
8. You will now see that you have a three stranded braid. Create a parallel second line by following the twine you originally laid out, and continue around your round object. You may need to use tweezers to pull your twine through. Also I recommend taking it off of your round object when working to finish this. It will make the bracelet easier to work with.
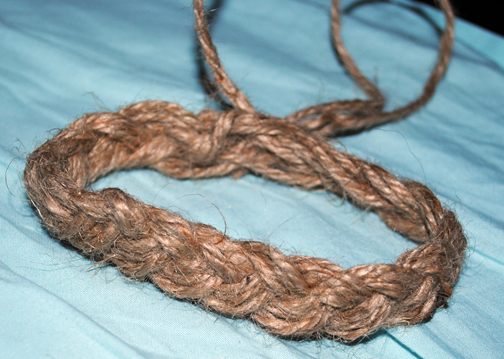
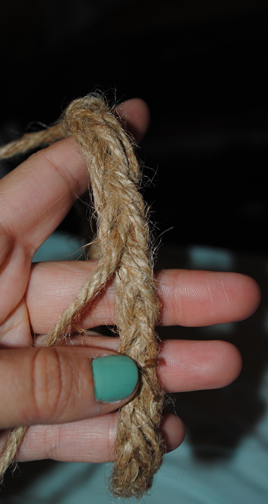
9. You are continuing to knot the twine or rope around the bracelet until each strand of the braid has at least one parallel line. It took me a total of three time around to make this happen. At this point if you would like to create the traditional Turk\’s Head Knot you will need to do another three passes so that you will have three parallel lines. To finish off just knot the ends together and weave the extra twine or rope into your bracelet.


I get these every year at the Jersey Shore. I want to make one! I've got lots of time being unemployed and all. Haha.
LikeLike
Nice DIY! I always need little tips like this.Xx
LikeLike
Thanks for sharing! This looks so FUN and beautiful 🙂
LikeLike
oh my goodness i love this 🙂 i love rope bracelets or such during summer months 🙂 i love how you used a nalgene to assist you in making it! 🙂
LikeLike
LOVE the bracelet would go perfect with all my nautical themed clothes!Glad you liked the earrings! 🙂Fashion in the Fog: Where are you SUN?
LikeLike
Cute nail polish!
LikeLike
The outfit that you put together is so summery and cute! I'd wear it in a heartbeat…
LikeLike
Nice really nice! Thanks for the step by step illustration! http://personalfoodjournal.blogspot.com/
LikeLike
Too cute! I would love to try and make this!
LikeLike
Neat bracelet! I love this look! I've been in to bracelets lately!!
LikeLike
Your bracelet turned out great! I love the nautical vibe of these and they just remind me of a day at the beach. That Tod's bag is also fabulous. xoxo
LikeLike
I love sailor knot bracelets! My friend taught me how to make them last year!
LikeLike
That bracelet is too cute! I should make one!I love the outfit that you pulled together. Wish I could have you go through my closet! 🙂
LikeLike
Love that earthy looking bracelet.
LikeLike
what a cool project!! thanks for sharing 🙂
LikeLike
Cool bracelet! I have like 0 artistic talent…mine would come out all funny 🙂 But this is totally perfect for summer!
LikeLike
I like it I'm gonna have to try it
LikeLike
Cute outfit..nice neutral palette.
LikeLike
that bracelet is really cute, I want to try creating one this weekend.
LikeLike
Ok, now I'm loving the turquoise nail polish! That DIY bracelet is a great idea!
LikeLike
Nice idea! I just bought a gray and white striped top similar to the one you showed! I love it.
LikeLike
Thanks for the tutorial, this is perfect for spring and summer!:D***** Marie *****allthingsmarie.com
LikeLike
This is fantastic- LOVE IT, trying it tonight!! Thank you : )xMichellehttp://www.michellesstylefile.blogspot.com
LikeLike
Hi! Great tutorial. How would I go about making a thicker bracelet that would be good for a guy? Would I be able to use cotton waxed cord? Also would beads work with this? Thanks in advance!
LikeLike