DIY: Heart Candle

Valentine’s Day is approaching quickly, no matter if you are spending it with girlfriends, a significant other….etc. Spoil yourself with a DIY heart candle martini glass….the hearts glow when the candle is lit!

Step 1: Place foil in the cavities of a muffin tin.

Step 2: Melt wax in your desired heart color and pour into a foil cavity.
(I melted a half used Yankee Candle)

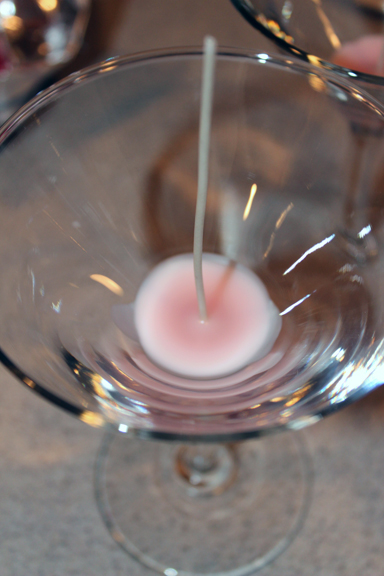
Step 3: While your heart wax is cooling melt your main color. Spoon a small amount into your martini glass and insert the wick.

 Step 4: While wax is still semi soft cut out your heart shapes.

Step 5: Press wax hearts to the side of your glass while they are still pliable. Once they become firm they will not stick to the glass and you will get your main color between the hearts and the glass.

Step 6: Pour in your main color and allow to harden.

 Step 7: Light and enjoy!

Five Things

 {Jack is loving his preppy seersucker shirt from American Digs}

This week all things girly have been inspiring me, from the heart suncatcher in my living room to new décor for the bathroom. It’s the little things that are getting me through this snowstorm (which is going to leave me snowed in this weekend). My weekend will be filled with time in the kitchen making treats for Jack, Mardi Gras and Valentine’s Day themed goodies. I hope you have a wonderful weekend! xx
 {new wall decor for the bathroom}
 {valentine: kitchen towels, soap and washcloth}
 {favorite lotion: Udderly Smooth Body Cream}
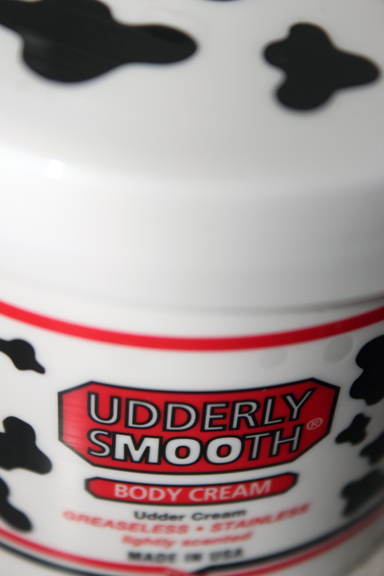
The name my be a turn off, but honestly this is the BEST lotion I have ever used!
{valentine suncatcher}

Peanut Butter and Banana Dog Treat

Valentine’s Day is not just for you and I it’s for our pets as well, and I have a perfectly easy Valentine’s Day dog treat recipe. All you need is silicon ice trays (I bought heart ones from Target for $2) a banana and a half a cup of peanut butter. Smash the banana (I heated mine in the microwave for 20 seconds to soften it up) and mix in the peanut butter. Spoon into the tray and freeze. Your pup will love you and the banana will help prevent cramping.
 {one large banana smashed}
 {1/2 cup peanut butter}
 {mix until thick and incorporated}
 {spoon into silicon mold}
 {creates cute little frozen hearts}

<!– /* Font Definitions */ @font-face {font-family:Cambria; panose-1:2 4 5 3 5 4 6 3 2 4; mso-font-charset:0; mso-generic-font-family:auto; mso-font-pitch:variable; mso-font-signature:3 0 0 0 1 0;} /* Style Definitions */ p.MsoNormal, li.MsoNormal, div.MsoNormal {mso-style-parent:""; margin-top:0in; margin-right:0in; margin-bottom:10.0pt; margin-left:0in; mso-pagination:widow-orphan; font-size:12.0pt; font-family:"Times New Roman"; mso-ascii-font-family:Cambria; mso-ascii-theme-font:minor-latin; mso-fareast-font-family:Cambria; mso-fareast-theme-font:minor-latin; mso-hansi-font-family:Cambria; mso-hansi-theme-font:minor-latin; mso-bidi-font-family:"Times New Roman"; mso-bidi-theme-font:minor-bidi;} @page Section1 {size:8.5in 11.0in; margin:1.0in 1.25in 1.0in 1.25in; mso-header-margin:.5in; mso-footer-margin:.5in; mso-paper-source:0;} div.Section1 {page:Section1;}                                                 {don\’t forget to let your pup lick the spatula!} *The above recipe is for treats only and should not replace your dog’s regular meal plans.

DIY: Heart Chocolates

Hearts, chocolate and pink are the three components that make up the perfect Valentine’s Day. Here is a quick, easy and cute chocolate idea.
Step 1: Melt pink candy coating.

Step 2: Use a toothpick to draw heart shapes in the cavity of the candy molds. Note: for perfect hearts place a drawing of a heart underneath the mold and trace over it. Allow the hearts to dry and then pour melted chocolate over the top While this little creation is super easy you will need a candy mold. I used “#90-5031 CK” 1.25 inch squares that I bought at a local cake supply store.

Step 3: Fill the cavity enough so it reaches the corners without overflowing and then tap the mold on the counter to get rid of air bubbles and even the coating. Place in the freezer for a few minutes to set and then pop them onto wax paper and repeat as needed.  Note:  I used Mercken’s chocolates, but any brand including Wilton will work.

Step 4: Optional wrap your chocolates in these pink foil wrappers.

Cream Puffs

During certain points of the year there are specific things I bake. In the fall it’s all about apple desserts, at Christmas it’s cookies and candies. While in the spring I can’t get enough fruit bouquets and the essential Valentine’s Day treat in my book is a cream puff. Don’t be fooled they only seem difficult to make; in reality they are simple and sure to impress.
 

Cream Puffs
Ingredients
Cream Puffs
½ cup butter
1 cup boiling water
1 cup sifted all-purpose flour
¼ teaspoon salt
4 eggs

Custard Filling
2 packages vanilla pudding
3 cups milk
1 cup heavy cream
¼ powered sugar
1 teaspoon vanilla

Directions
1. Melt butter in 1 cup boiling water. Add flour and salt all at once; stir vigorously. Cook and stir till mixture forms a ball that doesn’t separate. Remove from heat; cool slightly. Add eggs one at a time, beating after each addition until smooth.
2. Drop by heaping tablespoons on a parchment covered cookie sheet.
3. Bake at 400 degrees until golden brown and puffy (about 30 minutes).
4. Remove from oven; allow to cool slightly. Split in half and pull out stringy inside.
5. When cool fill with cream inside.

Custard Filling: Prepare pudding as package label directs, using the 2 packages of pudding and three cups of milk. Pour into a medium bowl over and chill for at least three hours. When chilled in a small bowl combine heavy cream, ¼ cup powdered sugar and vanilla with a mixer on medium speed until stiff. Fold whipped cream mixture into pudding until combined. Chill overnight before filling cream puffs.