Giveaway: The Sound of Music CLOSED
Rodgers + Hammerstein\’s The Sound of Music is coming to the Fox Theatre and I want to hook one lucky winner up with a Family 4-Pack of Tickets! Scroll to enter! This is one show you won\’t want to miss!

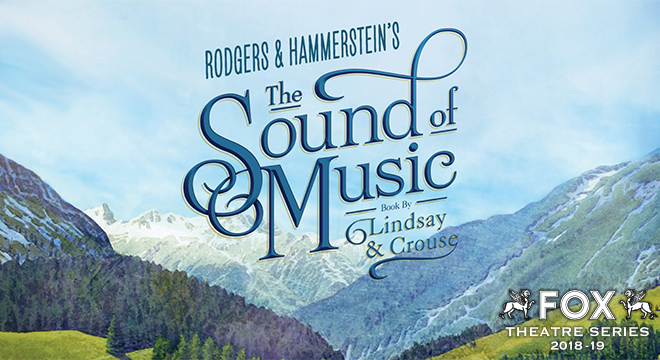
The Sound of Music will be in town for three performances from Saturday, April 13 through Sunday, April 14. The spirited, romantic and beloved musical story of Maria and the von Trapp Family will once again thrill audiences with its Tony®, Grammy® and Academy Award® winning Best Score, including “My Favorite Things,” “Do-Re-Mi,” “Climb Ev’ry Mountain,” “Edelweiss” and the title song.
The Sound of Music features music by Richard Rodgers, lyrics by Oscar Hammerstein II, book by Howard Lindsay and Russel Crouse, suggested by “The Trapp Family Singers” by Maria Augusta Trapp.
The Sound of Music enjoyed extraordinary success as the first live television production of a musical in over 50 years when “The Sound of Music Live!” aired on NBC in December, 2013 and was seen by over 44 million people. 2015 marked the 50th anniversary of the film version, which continues to be the most successful movie musical in history.
How to make a Sear-iously Awesome Steak

Who loves a good steak? Who knows how to make a good steak at home? Most importantly, who knows how to buy a good cut of meat? I’ll be honest with you, I used to be terrible at picking a perfect cut of meat. I would go to specific steak houses of hibachi restaurants just so I could get a good steak. That is until I went to a local grocery store with an amazing butcher her taught me everything I needed to know to make a delicious steak at home, and now I am going to share the details with you. Ladies, being able to make a steak at home is going to save you so much money. First you will need to make sure you have a cast iron skillet – this is the secret to amazing steak. You will also need salt and pepper, vegetable oil and of course steak. Good steaks include: ribeye, t-bone, strip, top sirloin. Chuck or Round is no good. Also filet mignon is good, however ribeyes are just as tasty and definitely cheaper. So let’s get to perfecting that steak.
First you will want to let the steak come to room temperature as well as heat your oven to 400 degrees Fahrenheit. If it’s frozen you will want to let it thaw in the fridge first. Season that baby! Rub salt and pepper into both sides of the steak. Heat the pan on high, add a teaspoon of oil and heat it until it smokes. Place the steak on the pan and cook for 5-6 minutes, it should have some browning and come up off the pan easily. Don’t forget to flip it, and cook it for another 5 minutes.
Take the pan off the stove and put it in the oven. Now you have think about how you like your steak, that will determine how ,long it cooks in the oven for.
Medium Rare: 3-5 minutes in the oven
Medium: 8-10 minutes in the oven
Medium Well: 10-12 minutes in the oven
Once cooked to perfection remove it from the oven and let it sit for 5 minutes. This will ensure you have a ridiculously juicy steak… yum! Trust me, you’ll definitely love this recipe and not regret learning how to cook a steak sooner. Now let’s get back to talking about steaks and how to tell a good one. I highly recommend visiting a local butcher shop to ask them questions about meat cuts, and how to tell what a good piece of meet is. Look into into butcher shop sarasota if you live in Florida, to learn about cuts and marbling. Butcher shops are able to physically show you the differences in meats, where I can really only do my best to explain them to you. In most cases you can get a reasonable piece of meat, and all the sides such as mashed potatoes (my favorite) for less then a meal at a restaurant. Let me know where you like to get your meat from and if you have any tips for me!
Tone It Up Galentine\’s Day

On Saturday morning I headed to Southfield to meet up with 60+ like-minded babes for the TIU Michigan 2nd Annual Galentine’s Day get-together. Being apart of the Tone It Up (TIU) community has been absolutely amazing. I have gone to barre, brunch, Chicago and even meetups in the woods – and all have been so much fun. The babes I have met and friendships that have been created will last a lifetime and Saturday was no exception. We started the morning with a little meet and greet, Kundalini Yoga, followed by healthy snacks and plenty of swag from all of our amazing sponsors.
I’m sure most of you have not heard of Kundalini Yoga before, well it is a blend of Bhakti Yoga (the practice of devotion and chanting), Raja Yoga (the practice of meditation/ mental and physical control) and Shakti Yoga (the expression of power and energy). The goal of a well-taught class is to leave you feeling like you’ve gone to a therapy session, had a great workout, made it to your yoga mat and enjoyed a fun singing session with friends.
Last year at the first Tone It Up Galentine’s event I tried Kundalini Yoga for the first time and absolutely loved it. Therefore I was definitely excited to give it a try again this year. Kundalini Yoga incorporates movement, dynamic breathing techniques, meditation and the chanting of mantras, such as “Sat Nam” which means “truth is my identity.” The goal of the practice is to build physical vitality and increase consciousness. What I really loved about Kundalini Yoga is how it makes me feel about myself, it gives me so much body positivity and really makes me want to be better to my body and to myself. I truly feel like Kundalini helps get rid of negative energy and see things in a positive light which is 100 percent what I need in my life. I will do an entire post later on Kundalini Yoga so stay tuned!
After yoga, we got our snack on. We each brought a snack to share, so after our little photo shoot and yoga we indulged in some goodies. From salads and fruit to dessert hummus, pigs in a blanket and protein muffins there were plenty of goodies to indulge in. I am already excited about our next meetup with these wonderful babes.


Legally Blonde the Musical

Oh my God, oh my God you guys – Legally Blonde the Musical is a girly girl must-see! The musical follows the same story line as the lovable movie starring Reese Witherspoon, however this time it’s all singing. If you’re looking for a fun girls night out I highly recommend checking out the show. The nonstop sugar rush Legally Blonde the Musical supplies will have you on your feet applauding at the end of the show.


Coming to Detroit: The Lightning Thief: The Percy Jackson Musical

THE LIGHTNING THIEF: THE PERCY JACKSON MUSICAL, an “electrifying” (Newsday) musical adaption of the New York Times best-selling novel written by Rick Riordan, will play Detroit’s Fisher Theatre,
