Make a Statement

In elementary school I remember learning about ancient Egyptian culture, and that is when I first fell in love with statement jewelry. The Egyptians had such lavish and beautiful pieces. Now statement jewelry combines elements from previous decades and a variety of cultures. Ultimately giving us all the glitz and glam that we love, here are some of my favorite statement pieces.


11 Ways to Beat the Heat

We are already half way through July and the temperatures are holding steady in the high 90’s. As a result it is making it miserable to spend time outside. Here are 11 ideas for beating the summers heat.
1. Make a batch of homemade ice cream (old fashioned vanilla)
2. Create new candles from left over wax of candles you have burned.
3. Spend sometime in front of the mirror creating different hairstyles (fishtail braid, ballerina bun).
4. Create your own summer signature cocktail.
5. Play classic backyard games (croquet, bocce, badminton) in the backyard at sundown.
6. Buy some watercolor paints and have some fun! Paint cards for friends and family or create a unique art piece you can frame for your house.
7. Create an indoor herb garden.
8. Crank up the AC, and try out a new cookie recipe (banana split cookies).
9. Rearrange a room in your house to create a new vibe.
10. Make a small basket with napkins, candies, a drink in a nostalgic bottle and popcorn for an impromptu movie marathon (with girlfriends or alone).
11. Give yourself a DIY mani/pedi with a fun design (sunset manicure).
How to: Sunset Manicure

Sunsets are the prettiest in the northern part of Michigan. Particularly when they are over a lake, and it is definitely a bonus if it is over one of the Great Lakes. On a recent trip up north I was sitting on the beach near the Mackinac Bridge. The sunset that night was a stunning display of tangerine, peach and orange. After taking multiple pictures that just did not do the sky justice I decided to recreate the serene setting on my nails.

{manicure inspiration: sunset under the Mackinac Bridge}

{left to right: OPI \’Come to Poppy\’, Jessica Cosmetics \’Tangerine Dreamz\’,
Orly \’Cotton Candy\’, OPI \’Are We There Yet?\’, Jessica Cosmetics \’Love Story\’}
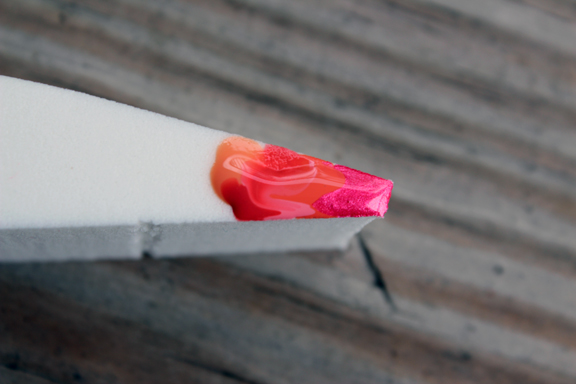
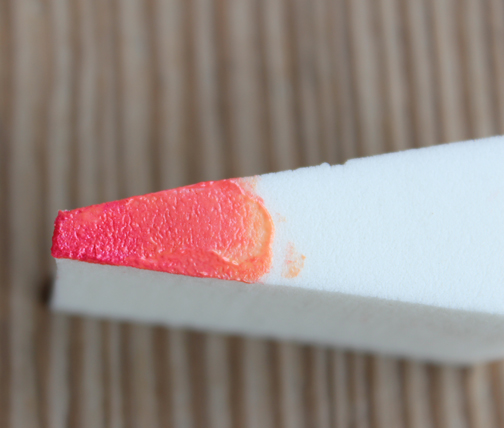
{drop a dot of each nail polish color onto a wedge cosmetic applicator}
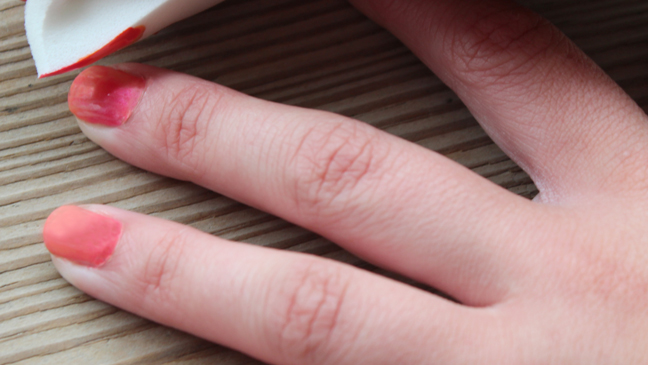
{dab the cosmetic wedge onto your nail}
{continue to use the same sponge and reapply colors for each nail}


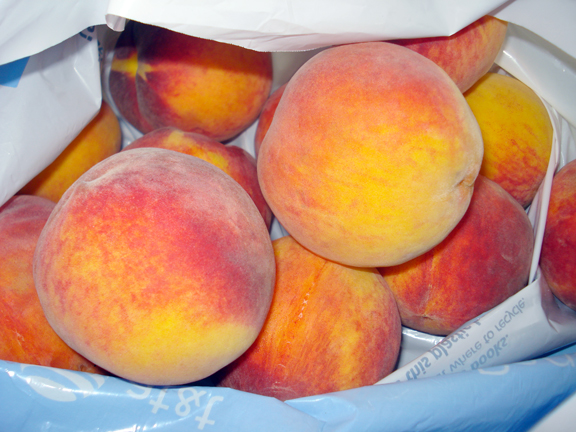
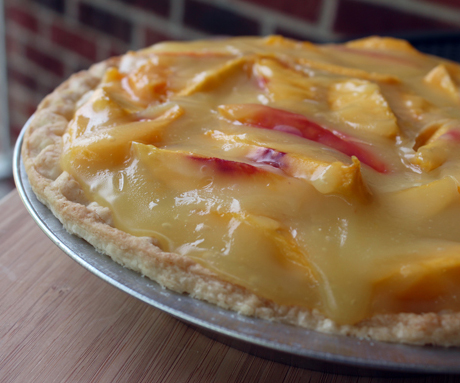
Sweet Peach Pie

There is nothing like a midweek trip out to the country. Where dirt roads are accompanied by roadside fruit and vegetable stands, and the farms are plentiful for pick your own fruit. As soon as I pulled into the farm the aroma of fresh peaches filled the air. After spending multiple hours picking the prettiest peaches I decided the best way to use some of them was in my great grandmother’s sweet peach pie. Resulting in the perfect combination of sweet and tart.


Sweet Peach Pie
Ingredients
• 1 cup water
• 1 cup sugar
• 5 tablespoons cornstarch
• ¼ cup lemon juice
• ¼ teaspoon salt
• ¼ cup butter
• 7 peaches, peeled and sliced
• 9 inch pre-cooked pie shell (homemade or store bought)
Ingredients
• 1 cup water
• 1 cup sugar
• 5 tablespoons cornstarch
• ¼ cup lemon juice
• ¼ teaspoon salt
• ¼ cup butter
• 7 peaches, peeled and sliced
• 9 inch pre-cooked pie shell (homemade or store bought)
Directions
In a medium saucepan combine water, sugar, cornstarch, lemon juice and salt, whisk until combined. Cook over medium heat stirring constantly until thick (hard to stir). Remove from the heat and add the butter, stir until melted and combined. Add peaches and gently fold to coat. Pour into your precooked pie shell. Refrigerate until set, about five hours. Top with whipped cream and serve.
Five Things

{never to old to play in the sand}
On Tuesday I was convinced that this week was never going to end. So you can imagine how thrilled I am for the weekend to be here. My weekend will consist of unpacking, DIYing and indulging in some Vitamin D poolside, but for now here are a few things that kept me happy this week. What are your plans for the weekend?
{red lipstick inspiration}

{fields of flowers}

{current manicure: nautical nails}
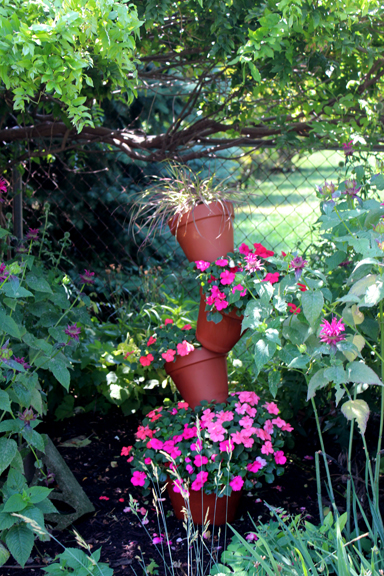
{whimsical planter half way through summer}
